Configure Development Environment
This section describes how to configure the development environment to build Play For Dream apps in Unity and contains information about hardware and software requirements.
Hardware Requirements
Play For Dream Devices:
- YVR1
- YVR2
- Play For Dream MR
Minimum System Requirements:
- 2.0+ GHz processor
- 2GB System RAM
Software Requirements
Operation System (any one):
- Windows 10 (64-bit versions only)
- macOS 10.11 or higher
Development Software:
- Unity Editor
Install Unity Editor
The minimum supported Unity version for Play For Dream app development is 2021 LTS. It is highly recommended to use the minimum supported version or higher.
The detailed information about the Unity installation process, please refer to the Installing Unity in Unity Documentation.
Configure Android Environment
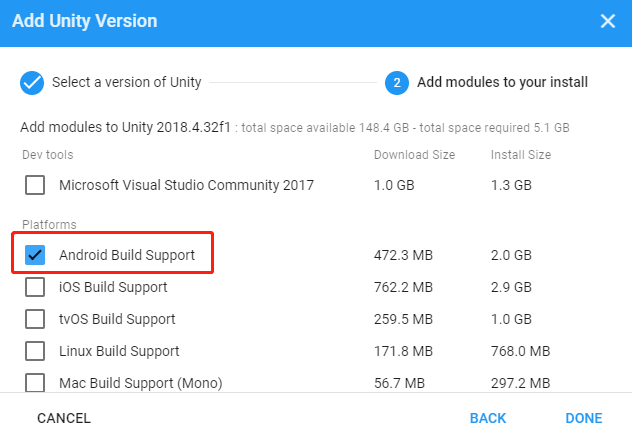
To build and run Android apps with Unity, the Android Build Support module of Unity, Android Software Development Kit (SDK), Native Development Kit (NDK), and JDK must be installed.
Install Android Build Support module
When installing new Unity Editor, make sure the Android Build Support is selected:
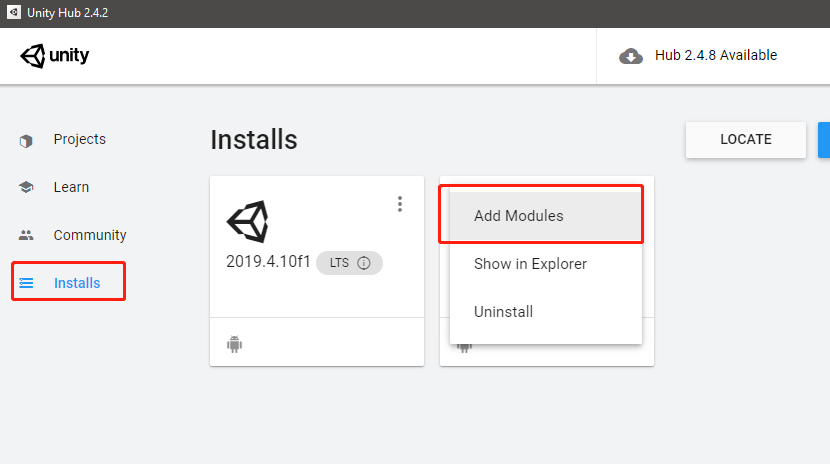
For the installed Unity Editor, modules can be installed later using Unity Hub:
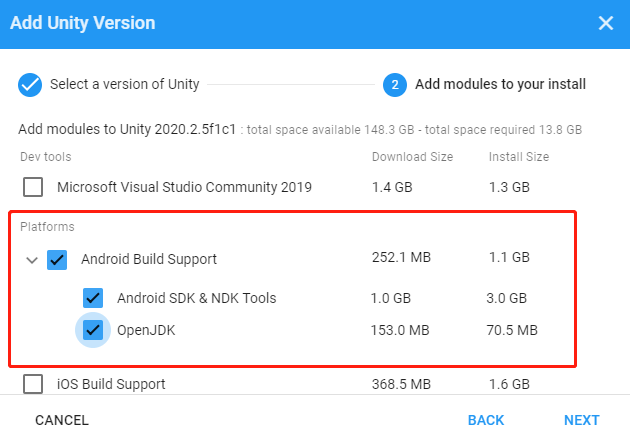
Install Android Tools automatically
For Unity version 2020.3 and higher, SDK, NDK, and OpenJDK can be installed together while installing Unity Editor.
Install Android Tools Manually
Android SDK and NDK can be manually installed through Android Studio. For more detailed information, please refers to the Update the IDE and SDK Tools in Android Studio SDK.
JDK can be installed from the download page of Oracle.
Tip
Recommend Android Platforms Version: 25, 28
Recommend Android SDK Build Tool Version: 28.0.3
Recommend NDK Version: 21.3.6528147
Recommend JDK Version: 1.8.0_211
Go to Edit -> Preferences -> External Tools menu in Unity Editor, paste the installed path of Android Tools in related blocks. You can be referred to the Unity Manual for this step (Section Customizing the Android SDK & NDK Tools and OpenJDK installation).
Note
If the android tools are installed automatically when installing Unity Editor, you can skip this step.
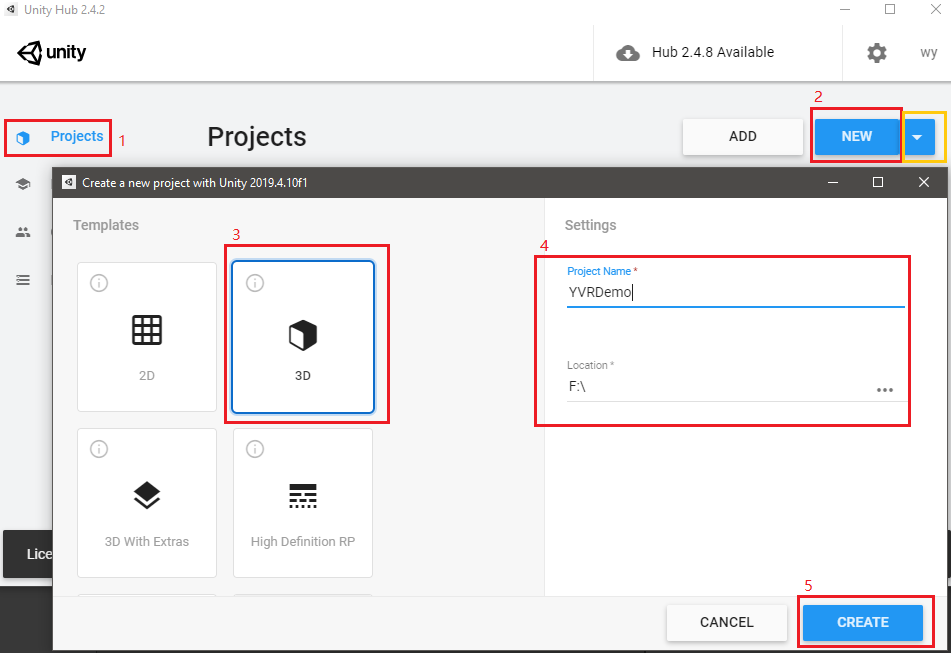
Create New Unity Project
After installing Unity, a fresh project should be create in order to get started with the rest of the settings and development.
To create a fresh project, the following steps should be performed:
Open Unity Hub.
Click
Projectstab and clickNew.Tip
If multiple Unity versions have been installed, click the arrow next to the
Newand select the target Unity version for fresh project.Select
3D, enter project name and location, and clickCreate.
The schematic diagram is as follows: