Configure Unity Settings
This guide describes how to configure Unity settings to optimize the app performance and quality.
Note
Play For Dream SDK has preset some of the following settings, SDK Setting window will be shown after importing the SDK.
Important
The settings for Unity are project-specific. Thus, the settings outlined in this guide are the basic recommendations. If you clearly understand the meaning of specific settings, you can take different choices to meet your own project.
Build Settings
Build settings let developers set the target platform, configure build-related settings and start building process.
Note
It is highly recommended to set the target platform before performing any other project settings, for the reason that many settings may depend on the target platform.
For Play For Dream devices, the target platform should be Android.
Perform the following steps to switch the platform to Android:
- From the menu, go to
File -> Build Settings. - Under the
Platformblock, selectAndroid. - Under the
Androidblock, set theTexture CompressiontoASTC. - Click
Switch Platform.
Caution
You may select Development Build to test and debug your app. When the final build is ready, make sure this selection has been cleared as it may impact the performance.
Project Settings
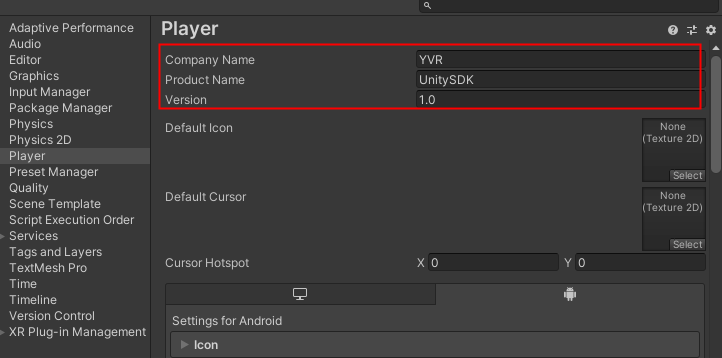
Add Product Details
Basic product details can be added in Unity to identify your company and app.
- From the menu, go to
Edit -> Project Settings -> Player. - In
Company Name, enter the name of your company. - In
Product Name, enter the name of your app which will appear on the menu bar when your app is running. - In
Version, enter the version number of your application.
Add Package Identification Details
The settings in this section will automatically change the package attribute in AndroidManifest.xml.
From the menu, go to
Edit -> Project Settings -> Player, selectAndroidtab inPlayerwindow, expandOther Settingstoggle list and find theIdentificationblock.In
Package Name, enter the application ID, which uniquely identifies your app on the device. The basic structure of this identifier should becom.CompanyName.AppName.Note
The
CompanyNamein the identifier should be equal to theCompany Namesetting in Product Detail.The
AppNamein the identifier should be related to theProduct Namesetting in Product Detail. However, if needed, feel free to deviate from theProduct Name.In
Version, enter the build version number of the bundle, which identifies an iteration (released or unreleased) of the bundle. The version is specified in the common format of a string containing numbers separated by dots (e.g., 4.3.2).In
Bundle Version Code, enter the internal version number, which is used only to determine whether one version is more recent than another, with higher numbers indicating more recent versions.Note
The is not the version number shown to user.
In
Minimum API Level, set the minimum Android version (API level) required to run the application. For Play For Dream devices, it needs to be set toAndroid 7.1 Nougat.In
Target API Level, set the target Android version (API level) against which to compile the application. In most cases, it should be set toAutomatic (highest installed).

Configure Configuration Settings
- From the menu, go to
Edit -> Project Settings -> Player, selectAndroidtab inPlayerwindow, expandOther Settingstoggle list and find theConfigurationblock. - In
Scripting Backend, selectIL2CPP. - In
Target Architectures, selectARM64. - In
Install Location, selectAutomatic. - In
Allow unsafe Code, select it.

Configure Package Rendering Details
- From the menu, go to
Edit -> Project Settings -> Player, selectAndroidtab inPlayerwindow, expandOther Settingstoggle list and find theRenderingblock. VulkanAPIs are not supported for time being. Thus, you can only chooseOpenGLES3orOpenGLES2, or both according to your project requirement.Multithreaded Renderingis supported, feel free to select it, if needed.
Configure Resolution and Presentation
- From the menu, go to
Edit -> Project Settings -> Player, selectAndroidtab inPlayerwindow, expandResolution and Presentationtoggle list. - Find the
Orientationblock, set theDefault OrientationtoLandscape Left.
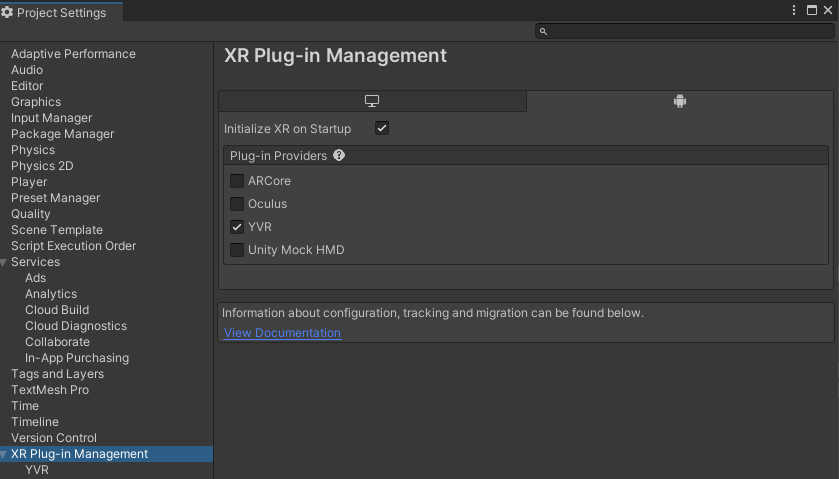
Configure XR Plug-in Management
- From the menu, go to
Edit -> Project Settings -> XR Plug-in Management. - Install XR Plugin Management, if it is not installed.
- Select the
YVRas Plugin-in Providers.
Configure Management
- From the menu, go to
YVR -> Tools. - Select the
VR modeto identify this is a VR application.

Note
If you select VR mode, the metadata com.yvr.application.mode will be automatically added in AndroidManifest. For application without this metadata, the system will treat it as a 2D application.
The selection status is saved in Assets/XR/Resources/YVRSDKSettingAsset.asset.