Build Your First App
This guide helps you build your first VR app in Unity. At the end, you will have an installation file (.apk) of your VR app which can be installed on Play For Dream devices.
Note
Please ensure that you have completed all steps described in the following guides:
Perform the following steps to create a simple VR scene and build an android .apk file:
From the menu, go to
File, clickNew Sceneto create a fresh empty scene.From the menu, go to
File, clickSave Asto save the scene just created. Select the saving path and enter the name for this empty scene (e.g. YVRDemo).Enter the
Projecttab, expand thePackages > YVR Core > Prefabsfolder, drag theYVRCameraRigprefab into the Hierarchy panel. Ensure that bothPositionandRotationproperty of theYVRCameraRiggame object in Hierarchy panel is (0, 0, 0).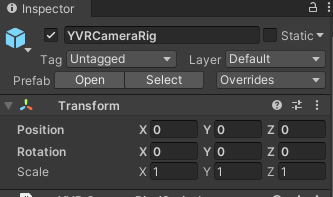
Right-click on the
Main Cameragame object in Hierarchy window, and clickDelete.Right-click on the empty area of Hierarchy panel, select
3D Object > Cubeto create a cube game object. Ensure thatPositionproperty of theCubegame object is (0, 0, 10). For now, the Hierarchy panel should look like: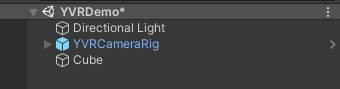
From the menu, go to
File -> Build Settings, and clickAdd Open Scenesbutton in theBuild Settingswindow to ensure this scene will be compiled into the output.apkfile.In the
Build Settingswindow, clickBuildbutton, and select the output path and enter the name of the output.apkfile in the popped-up window.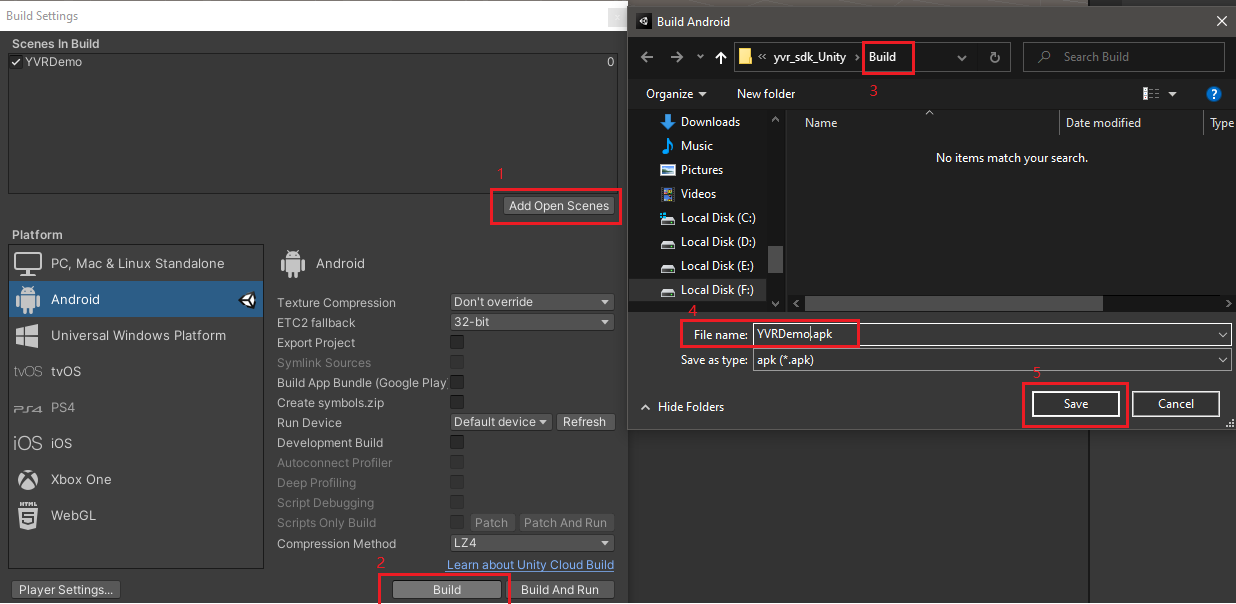
If everything succeeds, there should be a .apk file with your specified name in your specified output path.
The next guide Enable Device For Development and Testing will describe how to install the output .apk file into Play For Dream devices.